Pipeline is a powerful CRM tool inside Chitchatbot.ai that helps you manage, organize, and nurture contacts and opportunities—whether you’re tracking sales leads, managing support tickets, or qualifying prospects. With its drag-and-drop simplicity, it’s a flexible alternative to traditional CRM systems.
🌟 Key Features
- Drag & Drop Interface
Easily move contacts or opportunities between stages with a simple drag-and-drop. - Automation Triggers
Set up automations when a contact is added, updated, or moved within your pipeline. - User Roles & Permissions
Control who on your team can access or manage each pipeline. Super admins have full access by default. - Versatile Use Cases
Use it for lead management, nurturing, ticketing, or custom workflows—tailor it to your business.
🚀 Getting Started
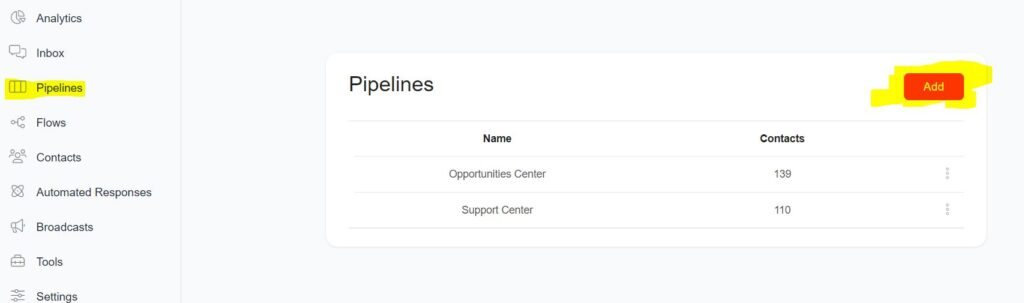
1. Accessing the Pipeline
Go to your Chitchatbot.ai dashboard → Click Pipeline from the main navigation menu.
2. Managing User Permissions
When you create a pipeline, you can assign permissions to specific team members.
🔐 Only super admins have default access to all pipelines.
🔧 Creating & Managing Pipeline Stages
You can create and customize stages to match your sales process, support lifecycle, or any workflow.
- To create or rename a stage:
Click the three-dot menu on any stage → Select Rename or Add Stage.
👤 Managing Contacts/Opportunities
➕ Add a Contact/Opportunity
- Inside the Pipeline, click Add New
- Enter contact or opportunity details
- Click Save
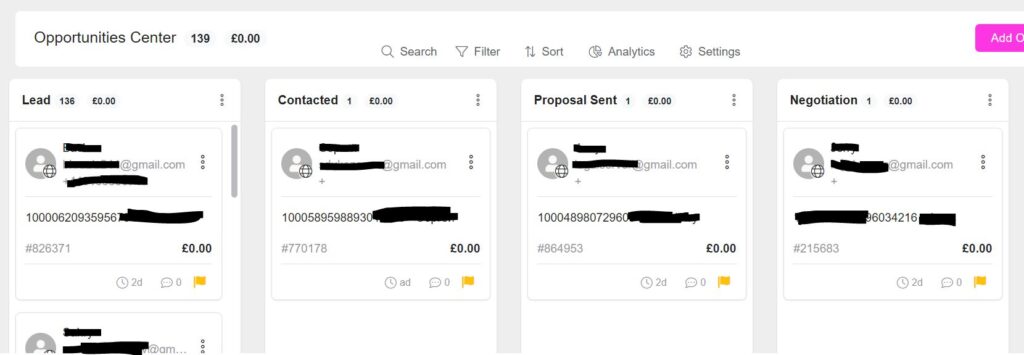
🔄 Move Between Stages
- Click the contact/opportunity card
- Drag it to the desired stage
- Drop it to instantly update its status
Each stage is clearly visualized, allowing you to manage and track leads intuitively.
You can now quickly filter opportunities and tickets based on the most recent stage change. Additionally, it’s now possible to filter by the last time a comment was added. These updates make it easier to track and manage your progress efficiently.
You can also click “Analytics” on a specific pipeline and it will provide you with various graphs and tables highlighting the performance.
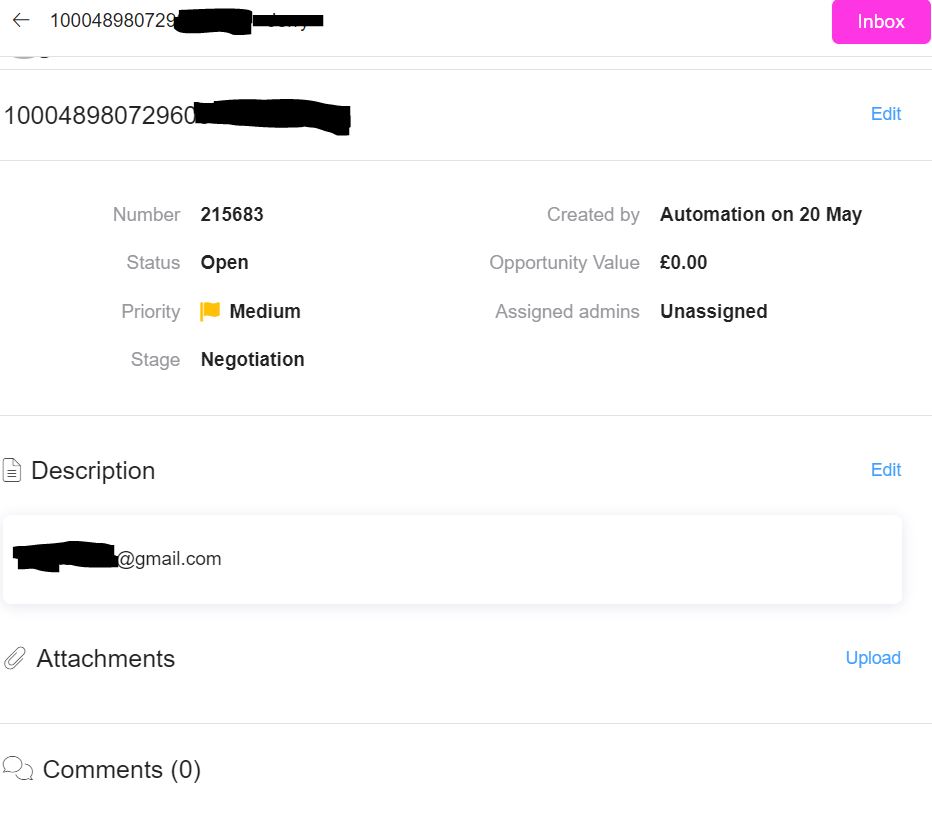
You can click on specific contact to manually edit info, add notes, assign leads and you can click “Inbox” in the top right corner to view the conversation and even send a live chat message or voice note.
⚙️ Automation Triggers
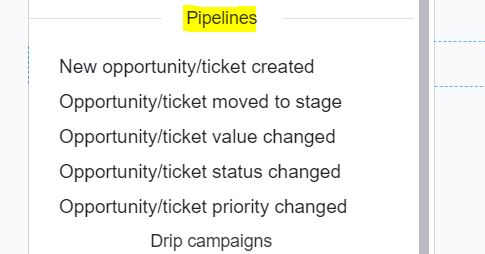
Trigger automations based on activity in the pipeline:
You can run automated actions when:
- A contact or ticket is created
- The value is updated
- It is moved between stages
Set these triggers from your Automation settings, and link them to flows, alerts, or external actions. To create an automated trigger/action go to Tools > Triggers & Actions
Example: Move a contact to “Closed”? Trigger a flow to send a follow-up email or send an API call to your third-party software.
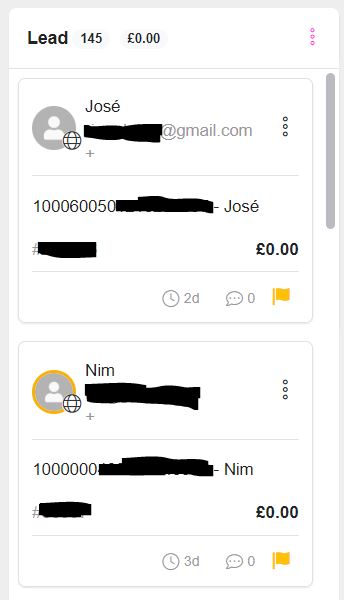
Instantly Spot New Messages from Contacts After Updates
We’ve upgraded the Pipeline to make it easier for businesses to spot when a contact has sent a new message after an opportunity or ticket update.
A yellow circle (see thumbnail image below) will now appear around the contact’s profile picture in the Pipeline to highlight this recent activity.