Creating the Dynamic Gallery
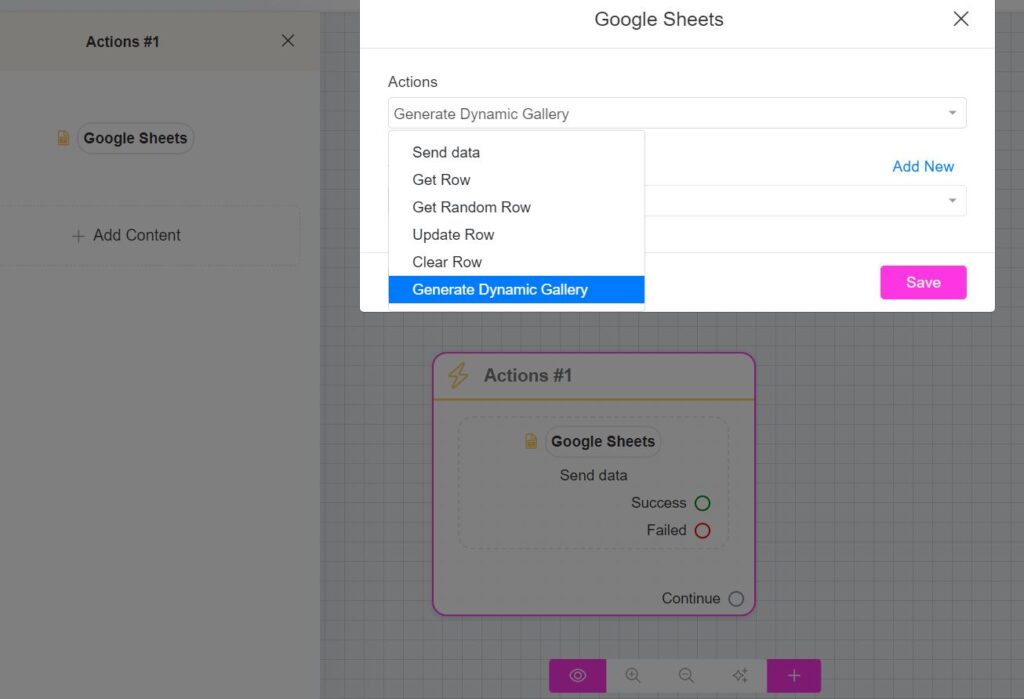
To do this, navigate to your flow builder and select the action Google Sheets -> Generate Dynamic Gallery from any Google Sheet.
Next, connect your spreadsheet and choose the worksheet you want to use. A gallery card will then appear, which you can customize to create your own gallery card.
To populate the image URL, title, and subtitle, use the columns available in your Google Sheet. By clicking the { or the variable icon, you’ll be able to see the names of your available columns, making it easy to select the correct one.
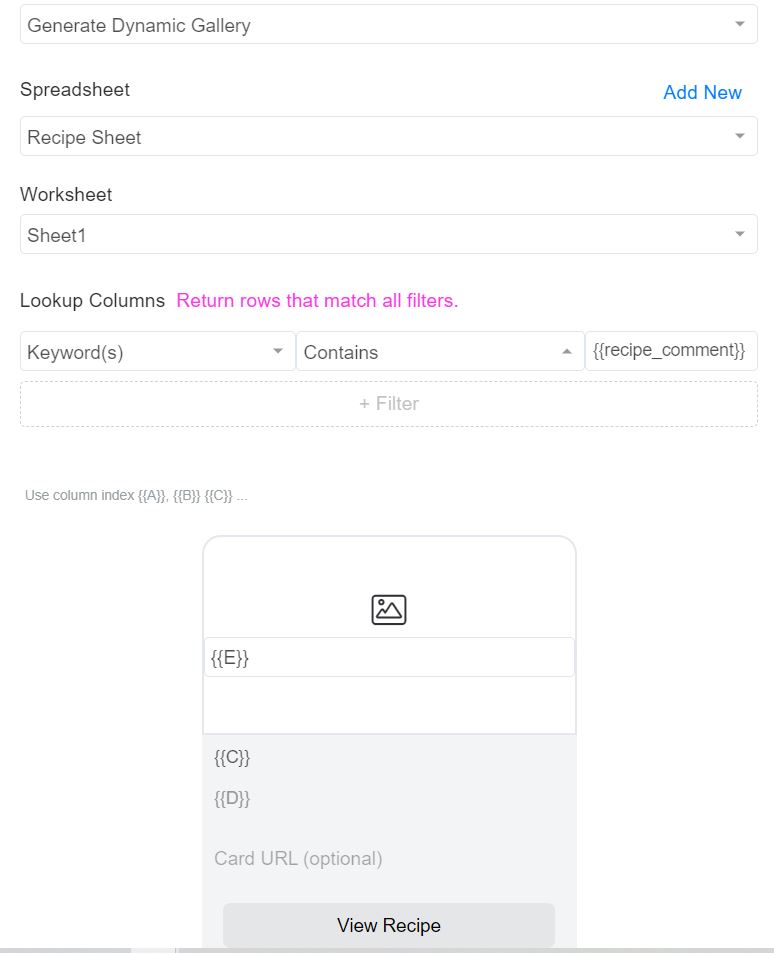
Selecting the correct columns is simple. However, make sure that the column for the image contains a valid URL, as an incorrect URL may result in an error when viewing the gallery card. You’ll also have access to additional variables for further customization or personalization if desired.
Once you’ve chosen your columns, you can optionally add a button. When configuring the button, you’ll have several options to choose from, just like when creating a regular button. These options include:
- Open website
- Call number
- Start step
- Start external step
When you select an option, you can perform additional actions as needed. There are no restrictions on the number of actions you can set up. However, Facebook does have limitations. Specifically, when setting a Custom field, the character limit is 1,000 characters. In most cases, this won’t be an issue, but if you’re storing a detailed description from your Google Sheets or combining values from multiple columns into a custom field, you may exceed the character limit.
How to provide dynamic information based on chosen option
So far, we’ve covered how to set up a dynamic gallery card. Now, let’s dive into how to provide additional information and use extra actions to fully understand how easy and powerful this new integration can be.
Let’s take a look at a sample sheet.

We have two items (recipes) here: a Broccoli Hummus and Med Veg. Depending on the subscriber’s choice, we want to display the detailed description that matches their selection.
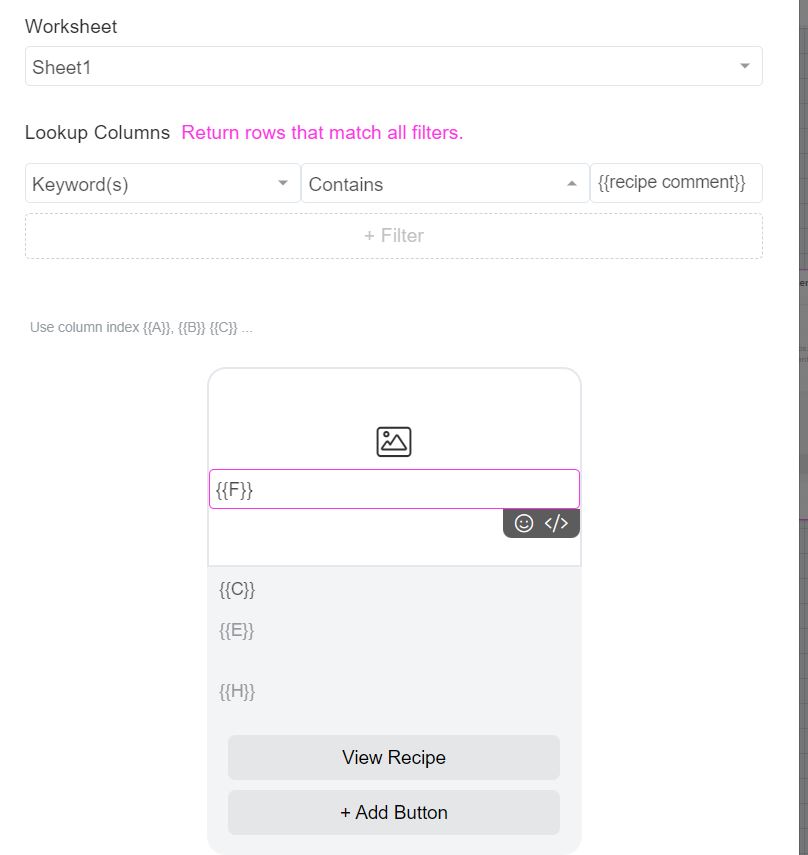
In the flows are capture the custom field “recipe comment” from the user/subscriber and then use this data to lookup the columns within the spreadsheet. So if “recipe comment” contains “Med Veg” it will display that within the gallery carousel.
Actions & Segmentation
Segmenting your audience based on their last viewed product or item in the dynamic gallery is simple.
To enable this, we will add another additional action: Set Custom Field. In this action, we will set a custom field called Last_viewed_item to the value of the Item Name in the Google Sheet. This will allow you to track and segment users based on their most recently viewed item.
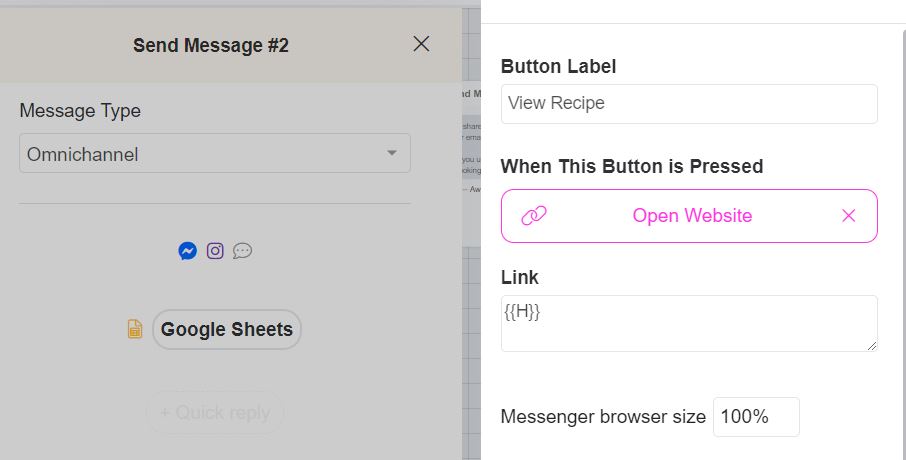
You can also add dynamic links to the buttons. For instance, when the button is pressed, you can set it to open a link from Column H in the Google Sheet. This allows the link to change dynamically based on the item or product being displayed in the gallery.
Segmenting your audience is crucial because it enables you to send personalized follow-ups, which can significantly boost conversions and engagement. By targeting specific groups based on their interactions, such as their last viewed item or other preferences, you can deliver tailored content that resonates more effectively with each subscriber.
