The AI Function lets you connect your AI integrations to automation processes and external tools. With it, your AI agent can:
- Collect user data.
- Trigger workflows.
- Retrieve information from external systems.
- Return results directly to the user.
Why Use AI Functions?
Normally, AI can’t access real-time or external data. With AI Functions, you can fill that gap:
- Example 1: Real-time data
User: “What’s the weather like in New York?”
→ AI Function triggers a Weather API → AI provides the answer. - Example 2: Lead qualification
If you’re a real estate agent, AI Functions can automatically collect details from prospects (e.g., budget, location, property type) before handing them over to you. - Example 3: Human handoff
Chitchatbot.ai includes a built-in AI Function (connect_user_to_human) that instantly transfers a conversation to a live agent. This is active by default for all accounts.
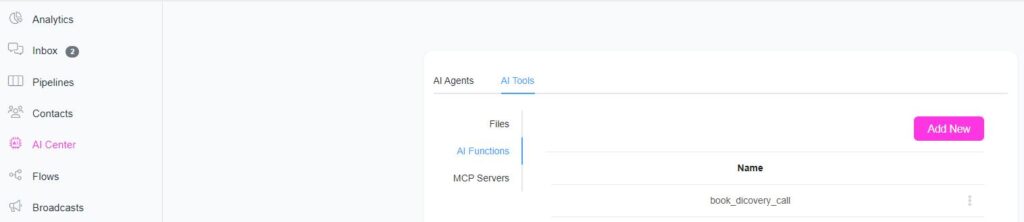
How to Create an AI Function
- Go to AI Center → AI Tools → AI Functions.
- Click Add to create a new function.
- Fill in the following details:
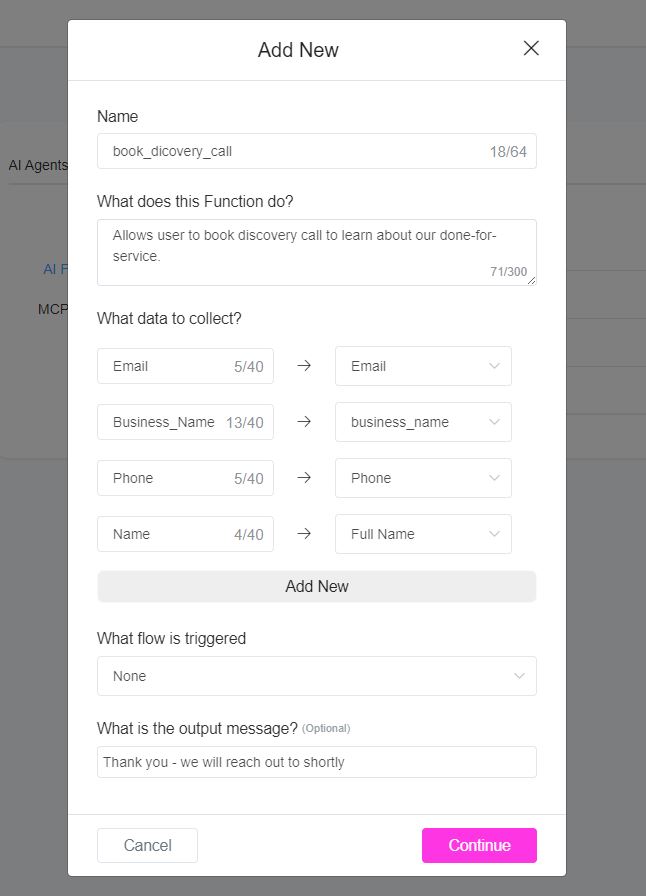
Name
- Use clear, descriptive names (at least 2 words).
- Example: Use
get_current_weatherinstead of justweather.
What does this trigger do?
- Describe the function starting with “Allows the user to…”
- Example: “Allows the user to book an appointment.”
What data to collect?
- List the exact data fields you want.
- Use meaningful names (
email,city,date) instead of random strings. - Example: For an appointment, collect
date,email, andreason.
What flow is triggered? (Optional)
- If needed, specify a flow to process the collected data.
- Example: Trigger an external request to a Weather API.
What is the output message?
- Define the result the user should see.
- Example: “Your booking was confirmed.”
- Important: AI will rewrite and send this message to the user.
- ✅ Best practice: Store the message in a custom text field and use that field as the output.
- ❌ Avoid sending it directly from the flow builder.
Example AI Functions
1. book_appointment
- Does: Allows the user to book an appointment.
- Data:
date,email,reason - Output: “You have successfully booked an appointment.”
2. connect_user_to_human
- Does: Allows the user to speak to a human agent.
- Flow: Triggers an Inbox Action that transfers the chat to a human.
- Output: “You are now connected to a human agent. We will get back to you soon.”
3. get_current_weather
- Does: Allows the user to check current weather.
- Data:
city - Flow: Connects to a Weather API.
- Output:
{{data_from_api}}
4. join_email_list
- Does: Allows the user to subscribe to an email list.
- Data:
email - Output: “Success”
5. request_shipping_quote
- Does: Allows the user to request a shipping quote.
- Data:
origin_address,destination_address,dimensions,weight - Flow: Calculates a shipping quote.
- Output:
{{quote}}
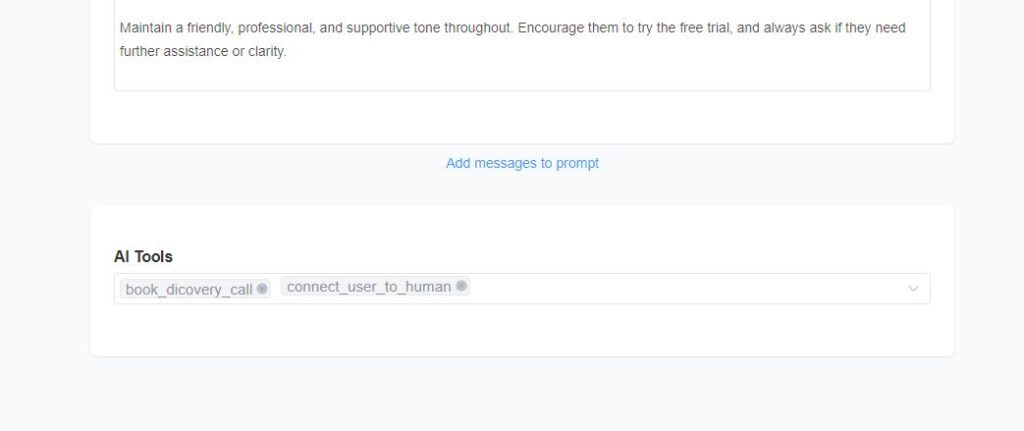
Enabling/Using AI Functions
After creating a function:
- Edit your AI Agent or AI Action.
- Enable the function so it can be called during conversations. Agent > AI Tools > Select the function you just created to link it to that agent.
Important Notes
- Your prompt can strongly influence how an AI function behaves.
- AI may try to fill in missing details automatically if the user doesn’t provide them.
- Example: For a restaurant booking, include in your prompt:
This ensures AI collects the right data before triggering the function.


