Voice automation is a powerful way to enhance customer engagement and streamline communication processes. With app.chitchatbot.ai, you can integrate AudioCodes, a leading voice gateway solution, to create seamless voice-enabled chatbots. This guide will walk you through the setup process, provide practical use cases, and share expert tips to help you get the most out of this integration.
Why Use Voice Automation with AudioCodes?
Voice automation allows your chatbot to interact with users via voice calls, making it ideal for scenarios like customer support, appointment scheduling, and information retrieval. AudioCodes provides a reliable and scalable voice gateway that ensures high-quality voice interactions.
By integrating AudioCodes with app.chitchatbot.ai, you can:
- Offer 24/7 voice-based customer support.
- Automate repetitive tasks like FAQs or order tracking.
- Provide a more accessible and inclusive user experience.
Step-by-Step Guide to Setting Up Voice Automation
Step 1: Prepare Your AudioCodes Account
- Sign up for an AudioCodes account if you don’t already have one. Use this link: AudioCodes Login – https://livehub.audiocodes.io/login
- When signing in for the first time, you will be prompted to create an account name – use your business name.
- Click “Bots” > “Add New Voice Bot” > Select “AudioCodes Bot API”.
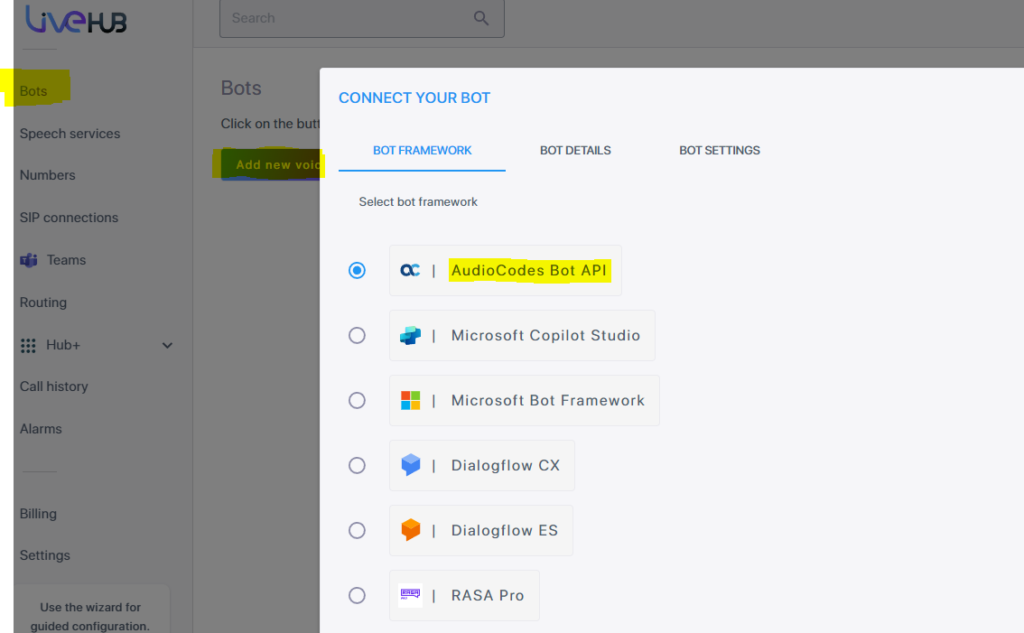
Step 2: Connect Your Bot to AudioCodes
- Complete the following fields on the “Bot Details” tab:
- Token: This can be any private phrase
- Bot Name: Add any relevant name, e.g. “Bot Demo”
- Region: Select your region, e.g. “Europe”
- Bot URL:
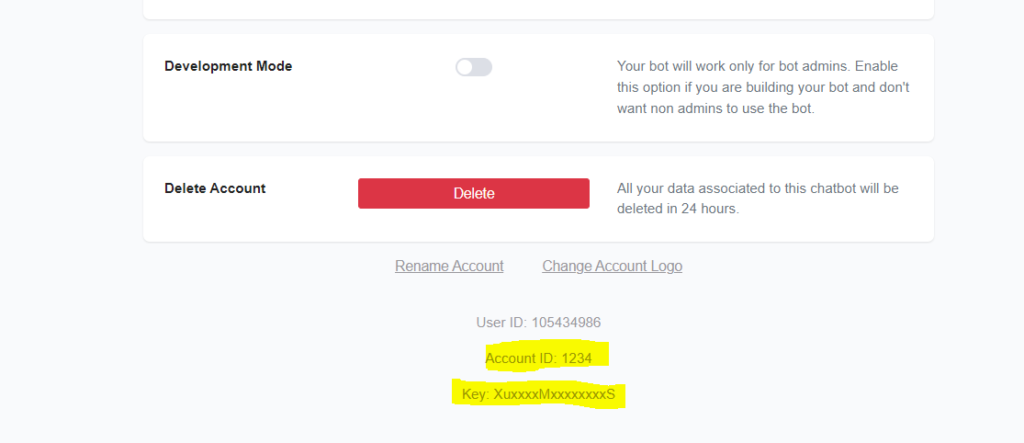
https://app.chitchatbot.ai/webhooks/audiocodes.php?acc={{ACCOUNT_ID}}-{{ACCOUNT_KEY}}e.g. https://app.chitchatbot.ai/webhooks/audiocodes.php?acc=321-xyz - You can find your ACCOUNT_ID and ACCOUNT_KEY in Settings on app.chitchatbot.ai (see image below).
- Click “Validate Bot Configuration” to check the connection. If valid, click “Next”.
- Select your language. Bot voice settings can be edited at any time. Click “Create” to complete the setup.
Step 3: Setting Up a Phone Number
- Click “Numbers” on the left-side menu.
- Click “Add New Phone Number” – AudioCodes provides one free trial number. Select one specific to your country and state.
- Once upgraded to a paid account, you can purchase multiple numbers or connect existing ones.
- Connect your phone number to your AudioCodes bot:
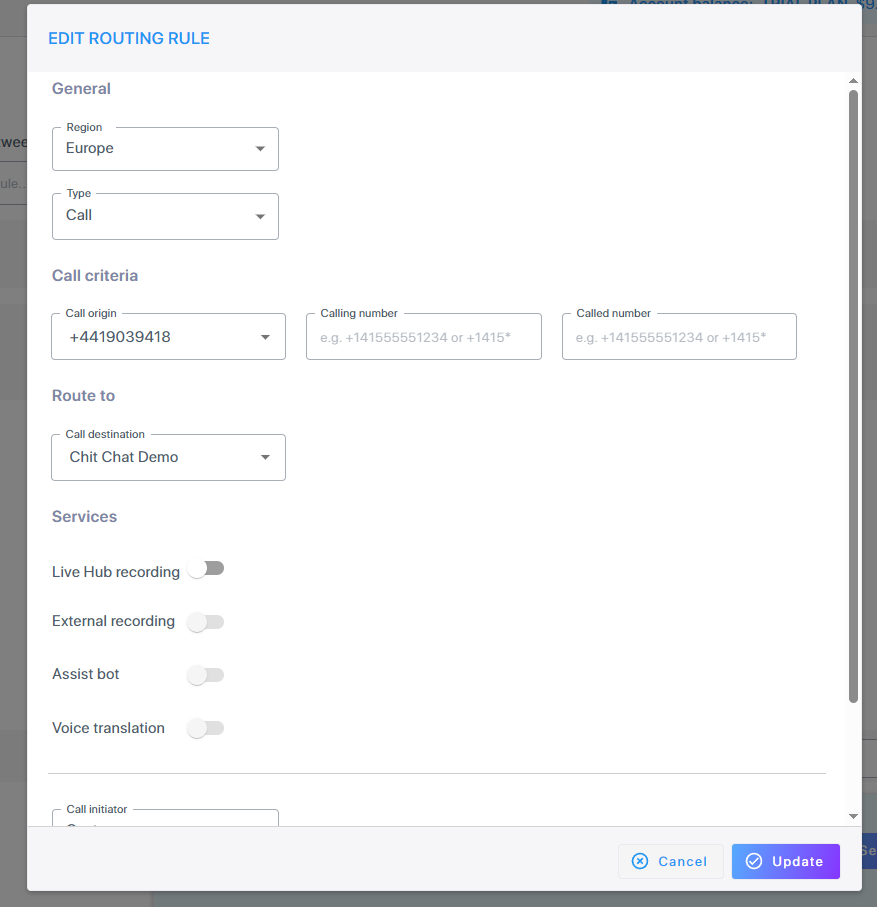
- Go to “Routing” (Left-side Menu) and click “Add New Routing Rule”.
- Call Destination: Select your bot
- Type: Call
- Call Origin: Select your phone number added in the previous step

Step 4: Connect AudioCodes Bot on app.chitchatbot.ai
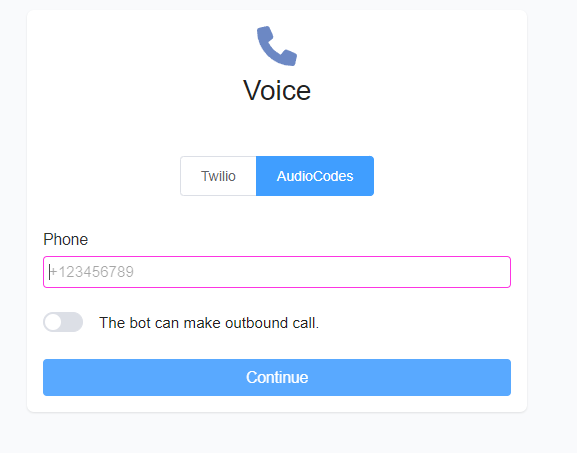
- Go to Settings > Channels > Voice and click the Connect button.
- Select AudioCodes (instead of Twilio).
- Enter your phone number (the one listed on AudioCodes). Keep “Make outbound calls” unchecked unless instructed otherwise.
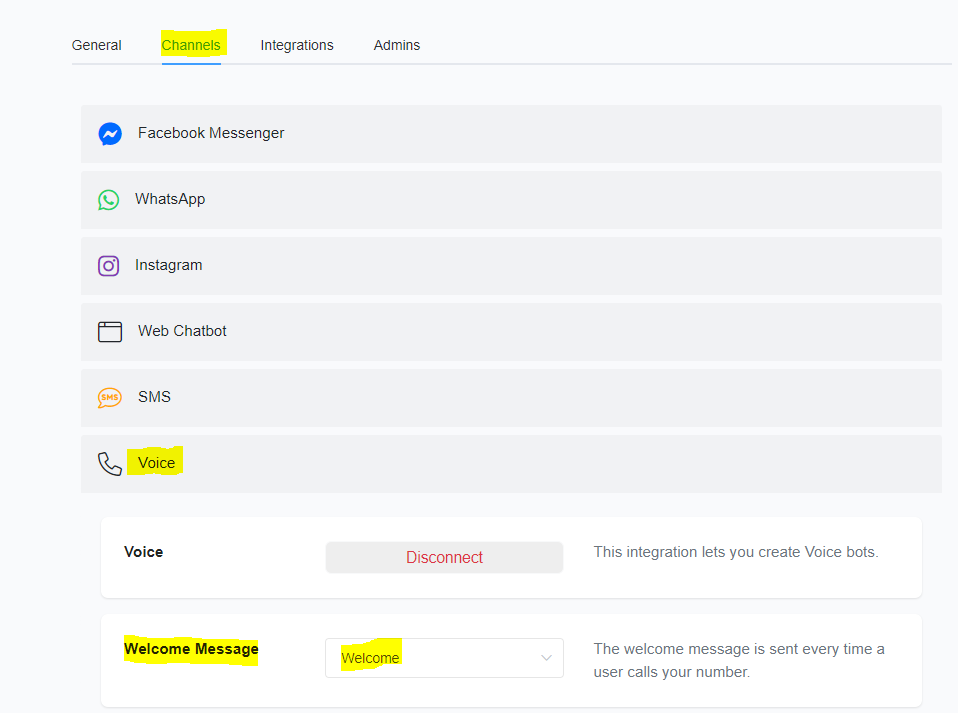
- Set a Welcome Message:
- Go to Settings > Channels > Voice > Welcome.
- Select or create a new Welcome Flow. This is the first message users hear when they call your bot. If not set, your bot will not respond until the user speaks.
Step 5: Building Voice Flows
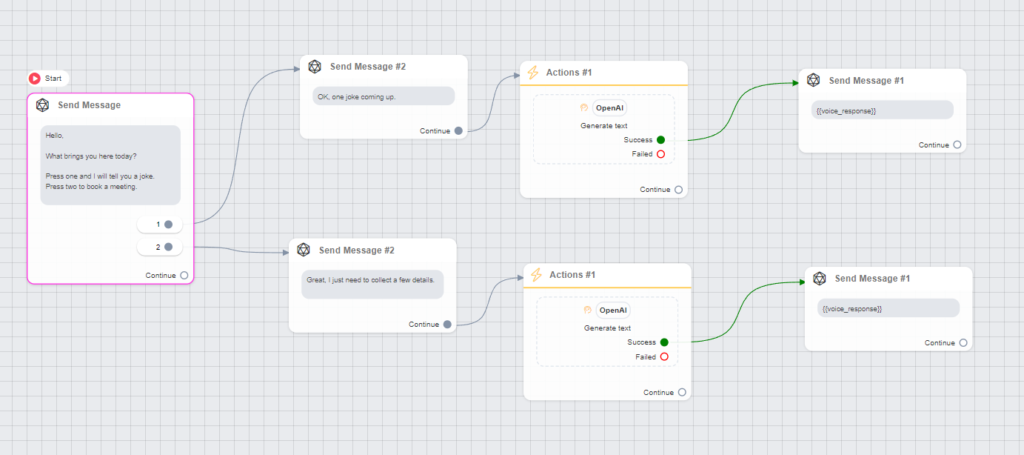
- On the voice channel, users receive text messages (converted to speech automatically) and can speak (converted to text automatically).
- Your bot can collect user input via keypad responses (e.g. “Press 1 for account info”).
- You can link directly to AI agents to capture user data using AI triggers/functions.
- Additional actions include Call (Outbound Calls Enabled), Hang Up, Transfer Call, Start/Stop Recording.
Step 6 (Optional): Allow Your Bot to Make Outbound Calls
- Skip this step if handling only inbound calls or lacking outbound call permissions.
- Enable outbound calls:
- On ChitChatBot.ai Settings > Voice > AudioCodes (toggle “The bot can make outbound calls” to Yes/True)
- Enter your phone number and additional details (Bot ID, Account ID, Account Secret from AudioCodes – go your bot settings on AudioCodes to view these details).
- Outbound calling requires an Essential account with outbound activation.
Real-World Use Cases
1. Customer Support Automation
- Handle common queries like account balance checks or order tracking.
- Example: A retail company reduces call centre wait times by 40% using a voice chatbot.
2. Appointment Scheduling
- Users can book, reschedule, or cancel appointments via voice commands.
- Example: A healthcare provider automates appointment scheduling, freeing up staff.
3. Multilingual Support
- Offer voice support in multiple languages.
- Example: A travel agency assists customers worldwide using a multilingual chatbot.
Voice automation with AudioCodes on app.chitchatbot.ai is a game-changer for businesses looking to enhance customer engagement and streamline operations. By following this guide, you can set up a robust voice-enabled chatbot that delivers exceptional user experiences.
If you need any help setting up your voice agent chatbot please don’t hesitate to reach out to our support team via email or chat.


